Building the Brace
Free to watch. No account needed.
12 more lessons in Footwork come with membership.
7 days free, then $9.99 a month or $99.99 a year on the web. Cancel any time.
Transcript
Let's talk about the brace. The brace is a very simple concept, not necessarily easy to implement, but it's very simple. Think of the word brace. Think of any other brace in any other part of your life.
You might think about a brace for your arm or a broken bone. You might think about a brace for like a bridge. You might think brace for impact. Well, all of those share the same idea, and it is we're stopping.
We are creating stability, and the brace in disc golf is no different. So when we teach the brace here at Overthrow, we don't teach transferring momentum. We don't use terminology that says go. The brace actively moves things.
What we want is stoppage as immediately as you can get it. My favorite phrase for the brace is you cannot fire a cannon from a canoe. Technically, you can. It's just not going to go that well.
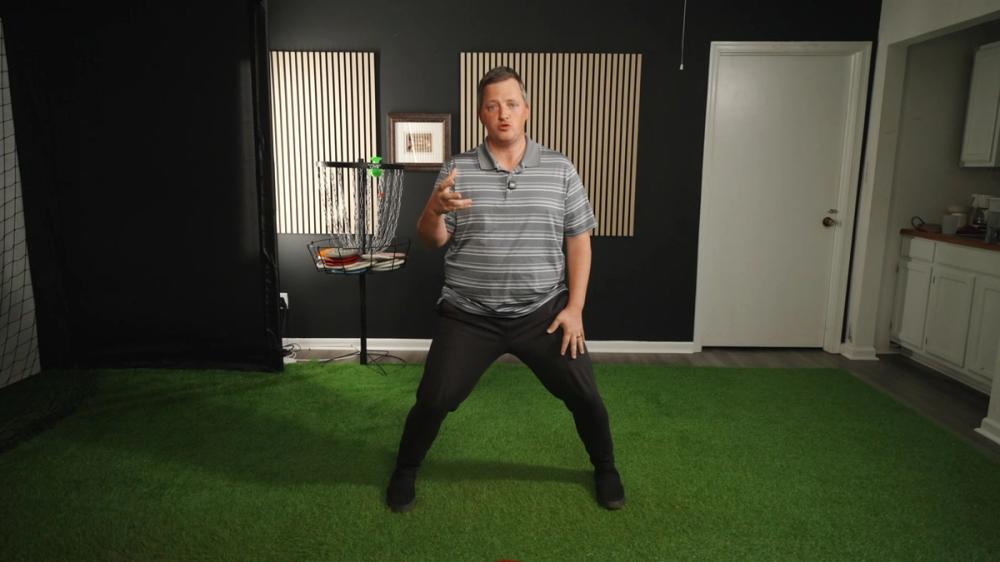
The harder we want to throw, the more solid of a base that we need underneath us. So let's build it. All right, we're going to set up in our athletic stance. So I want your feet shoulder and a half width apart here.
I want your knees bent. I want your butt kind of down. We are just setting up a solid base. Sometimes I have people just to feel this.
I have them jump and land, right? You're going to be planted both feet. When we're working on brace here, we're just creating as solid of a position as we can get here. Really important note, as we work on brace, we're going to do it from this position where both of our feet are equally down.
We're not going to incorporate a rock into this because what we're doing is we're using this standstill, both feet down to emulate what happens during a walk-up where we walk and we plant into this same position. You might think, I don't know, sumo wrestler or something. We're trying to get solid. So if I were on a course and I had to throw a standstill, I might do a little rock and I might do a weight shift.
But we're not going to use weight shift terminology here because in your walk-up, you're not going to do this. Here, here. Right? We just are going forward and we just need to stop that forward momentum with our walk-up.
All right. So it's here. And boom, don't move anymore. That's why we're working on this.
We're working our standstill with the goal of being good at a walk-up. We're not working our standstill with the goal of being good at standstills. So little difference there. If you came here thinking, I want to get really good at standstills, this is not the course.
So when we coil and we do things, we're not going to go here and take our foot off the ground and there. We're trying to just plant, set up in these drills, and then just stay here. And then we'll learn to release from this position in a later module. Okay.
So here we are. Solid base. And I'm thinking of my base as everything. Here, everything you see.
All the way here, hips, all the way down to the back leg. This is my foundation. I want as much of it connected right now as possible. So we've got our base here.
I'm going to try to keep it all right here. So we're just going to shadow swing this a little bit and coil and swing. And your temptation is going to be this. It's to move.
Now my weight's gone to the outside of my left foot. It's come off of my right foot. And then that's going to cause me when I try to pull through to shift this brace forward. I don't want to do that.
We're simulating. We're down. No more movement. So here, I'm just going to experiment turning and seeing kind of how far I can go through this without moving.
I'll pick up the speed a little bit, throw, trying to keep it here. You might find it helpful to think about like keeping your knees pointed that way. Just throw, throw around a little bit, trying to keep it, trying to keep it fairly locked. Now we're going to incorporate some actual throws.
I'm going to go, I don't know, 50%, let's say. And it's not going to be a full coil either. I think that's as far as I can go before my hips really have to turn to get me any further back. So here, just trying to stay solid.
Both feet totally on the ground, keeping my left heel down, right heel down, toe, the whole foot down. Good. Here we go. I'm going to go a little bit faster.
You'll see that it wanted to move a little bit. This is a lot of the reaction that we see with pros when they're bracing. You can only move your shoulders so far and move your core so far without your hips turning, right? Try this.
I think it's helpful to understand kind of how this works. So a lot of people think about hips moving from kind of underneath, right? That would be if I move my hips, keep my shoulders here and try to move my hips with my feet, right? So you can do that.
You can only go so far before your shoulders end up moving, right? So that's moving hips from the bottom up. On the back hand, we move the hips from the top down, I would say. So we're going here.
Now keep your hips here and move your shoulders as far back as you can move them without moving your hips. That's it for me. That's as far as I got. So at this point, now I'm going to move, I'm going to unlock my hips and move my shoulders further back.
Now I didn't move my hips. I mean my shoulders further back and my shoulders turned my core, turned my hips. So you can only move your shoulders so far before your hips have to move. Now back to throwing.
Here we go. Shoulders back. Here I feel like my hips are going to move just a little bit. I'm going to try to keep my feet planted.
Hips opened up a little too much there. I'm going to try to do it again, lock them down. And this is the hard thing. Once we let them move a little bit on the way back to kind of keep them.
So we're here, hips need to stay wherever this feels like to you. For me, it feels like my hips are there almost. I'm just going to leave them there. There.
That's a good practice rep for me. And we're not doing a huge throw here, but we're doing enough to tempt our hips to go forward early. Stay. Good.
Hips have stayed. Here we go. Shoulders back. Hips stay.
Throw. All right. So I like to see that at slow speeds because if we can't do that at slow speeds, if we start bringing a lot of upper body movement, the hips are going to get real happy. Start moving too much.
So throw like this a couple times. I want you to pay attention to what your lower body feels like as you do this, as we try to keep it because keeping it here is the brace. You might feel a couple things. You might feel like, okay, trying to stop here.
I feel my leg pushing against the ground. I feel my hip trying to move. I feel X, Y, Z things that you may have heard on other videos and from other people before. And I think what's really important is that those things that you're feeling came as a result of trying to stay, trying to stop.
When you go into a throw and your goal is let's transfer some energy. Let's move. You don't do a really good job of stopping. Your brain doesn't like stop, but actually go.
Right. So the idea here is stop and you'll feel some things moving in an effort to keep you here. So throw, try to stay here. And just pay attention to those things.
Work your mind kind of around the brace. And when you've got this kind of core idea, meet me in the next module where we'll work on expanding the throw from there.